Check out this action…
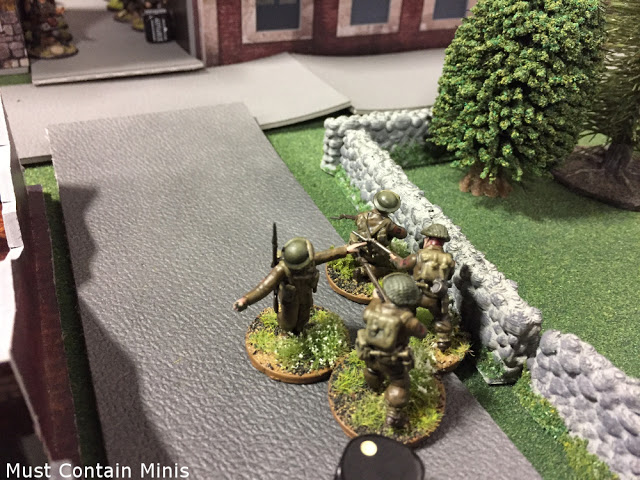
In the scene below, we have three groups of British infantry holding on valiantly against multiple German troop units, a medium machine gun team and a flamer team. The situation for the Brits is desperate – but this is not where the battle started.
 |
| A scene near the end of the game where the British valiantly hold on against an oncoming German army in Campaign: Sea Lion’s “Capture a Port” for Bolt Action. |
Before my buddy Dave arrived, I set up the table a little too sparse. The table actually resembled something better for a game of Warhammer or Tank Wars than for Sea Lion. Once Dave arrived, he immediately questioned the lack of terrain and showed me the suggested scenario map for “Capture a Port” on page 107 of the Bolt Action: Campaign: Sea Lion book. He was right, the book showed much more terrain than what I set up. A few minutes later and we upped the building count by five and added in more soft cover and terrain features. What a difference both strategically and aesthetically.
 |
| This is the table I set before Dave arrived. |
 |
| After some light criticism and referring to the rulebook, we set the table with much more terrain to make for a more constricted firefight. This is the table on which we fought. |
In the scenario to come, the British would be defending one of their port towns against an invading German army. Because this is a Sea Lion Scenario, this is a town actually on Britain shores.
We decided to use the optional rule “Command & Control Breakdown” for this mission. With that rule, one unit must be left either Down or in Ambush from one round to the next. In each subsequent round, that number increases by one. This is to represent confusion in an urban combat environment.
The British Player (me) brought a Regular Infantry Army while the Germans (Dave, and Aaron for part of the game) brought a Beach Landing Force.
 |
| Above is the British Army. The force was comprised of Two Universal Carriers (one as an armoured car option and the other as a tank option), A Major and his assistant, A First Lieutenant with two helpers, two 9-man Infantry sections with Bren Guns, a 6-man Infantry section with a Bren, a light mortar team, an anti-tank rifle team, a medic and a medium machine gun team. All of my infantry sections were upgraded to have anti-tank grenades. |
 |
| My opponent brought four 8-man infantry squads on bicycles, a First Lieutenant, an airstrike spotter, a medium machine gun team, a medic and a flame thrower team. He also brought a StuG III (we proxied a StuG IV for that). As an interesting note, Dave 3D printed those bicycle tokens. |
For deployment, I set up my troops in three basic areas. I had the bulk of my force in a warehouse out of immediate harms way. I then set up one of my carriers and an MMG (medium machine gun) team to overlook the middle of the table maker. This way I figured I could get a shot on Dave’s troops if they ever crossed the line. My final group of guys, I kept in reserve.
Dave decided to start with all of his forces on the table. He set up his forces for a basic two prong attack.
 |
| I placed the bulk of my force by this warehouse – out of harms way. |
 |
| I placed an MMG team and Universal Carrier to look over the dividing line on the table. The MMG deployment would prove to be a mistake. When I placed them, I thought that the gun teams could fire like rifle teams and fire 180-degrees from the window. This is not the case. He could fire only forward, making his position useless. Rather than moving him, I made this the first team to fall subject to the “Command and Control Breakdown” rule. |
 |
| Dave deployed two groups of cyclists as close to the middle line as he could. |
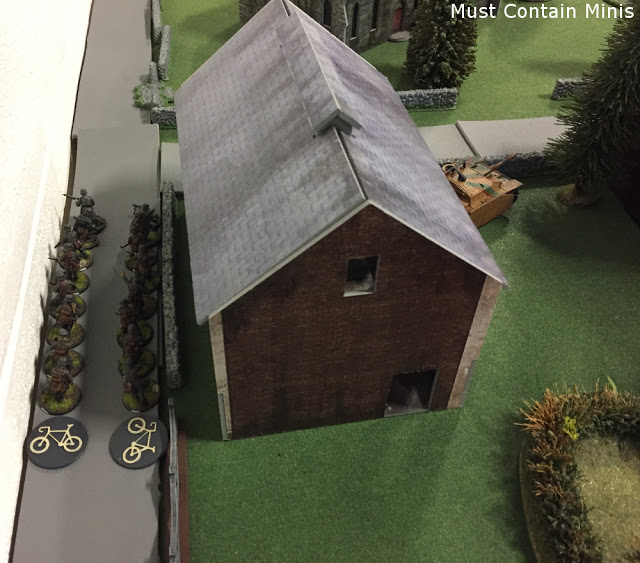 |
| He added his other two cyclist sections on the far side of the board along with a StuG behind some cover. |
 |
| His flame thrower, medic and MMG teams near the middle of the table behind cover. |
Not pictured above is that Dave placed the aircraft spotter in the top of the church bell-tower. I drew the first activation dice, moved my small mortar team forward and fired off some smoke aiming to block the StuG’s line-of-site. The smoke missed its mark, but the Germans had a new primary target to take out. I couldn’t believe how much fire that poor light mortar team attracted after this moment.
 |
| The nice thing about light mortar teams is that they are a barrage unit that can move and shoot. I take these guys in almost all of my lists. Right off the top they moved forward and fired some smoke in an attempt to block the StuG’s line of site. |
 |
| The smoke missed its mark, but the Germans had a new primary target to take out. |
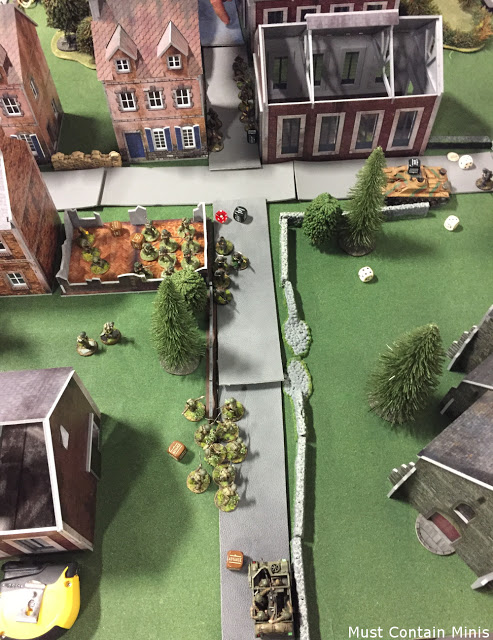
I personally, was very surprised with how fast troops on bicycles move. Dave’s forces were on me in no time. Below is how the field looked after the end of the first round.
 |
| The scene at the end of the first turn. I still have a group of guys in the warehouse on the bottom right. My antitank rifle team would be the first unit to go in a hail of bullets. |
Now Dave made a huge error on his first round. He did not declare anyone down or in ambush while I had left a couple of teams in ambush. This meant that I could choose a unit of his to be down for the next round. My choice, his StuG.
 |
| That’s right, Dave’s tank goes down due to battlefield miscommunication! |
 |
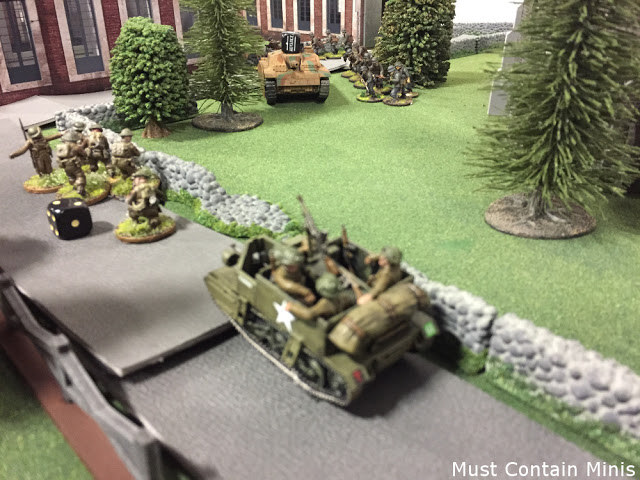
| I advance my second Bren Carrier onto the table without fear. I then moved the unit out of the warehouse to face the German bicyclists that came in so fast on the last turn. |
 |
| Behind the building, Dave sneakily moves his flame thrower team hoping that I won’t notice. Oh, I notice! On the plus side, his aircraft spotter has not yet called in an airstrike. I now have two units within assaulting distance of his observer. One six man infantry unit and the major with his assistant are on the bottom floors of the church. The six man squad is depicted on the outside, but they are currently on the inside. |
 |
| In the next turn, I got the first die again. I rushed my six man team up to the bell tower to assault his three man spotter unit. I killed one of his men and he killed two of mine. This means that he won the assault and my unit was eliminated. |
 |
| The next die is again mine, so I rushed my Major up the tower for a two-on-two battle with the Air Observer. This time I won the assault and my Major was the sole survivor. |
For those wondering why Dave held his air-strike, he was waiting for a more opportune time. Unfortunately for him, that time would not come. When I asked about why he didn’t call in a strike on the first round, he stated that it was because he moved his bicycle guys in a little fast and he did not want to hit his own guys with the air support.
 |
| I then assaulted with my troops (originally from the warehouse) and wiped out a German squad. That was the squad that kept my guys safe from the air strike. Fortunately, there was no longer an air observer to worry about. Sorry Dave!!! 🙂 |
 |
| While my forces were fighting well, I had my own problems to deal with. Across the street from this townhouse is a flamethrower team. Everyone in the building shot at the flamethrower team with little effect. |
 |
| I even had a medic near by, but he can’t help burn victims. Just those hit by small arms. |
 |
| This little unit proved to be very effective both in offense and defence (defence because they drew my fire from other units). All I managed to do was put a pin marker on them. |
At this time, both sides were feeling desperate, and both Dave and I felt like we were fighting a losing battle. As a reminder, we had the “Command & Control Breakdown” rule in effect so each round we were both losing teams to activate due to the confusion of a city fight.
Dave managed to take out one of my Bren Carriers and then started targeting the second one. Was I ever feeling nervous!!!
 |
| Dave’s StuG takes aim at my second carrier, but misses. |
 |
| My team in the open takes a lot of fire but survives. |
 |
| Lady luck is smiling down on these guys. With the amount of fire that they were taking, they should have been dead. |
 |
| The same can’t be said about the British First Lieutenant. He went down in flames along with his two assistants. That Flame Thrower team just earned more than its points back. |
 |
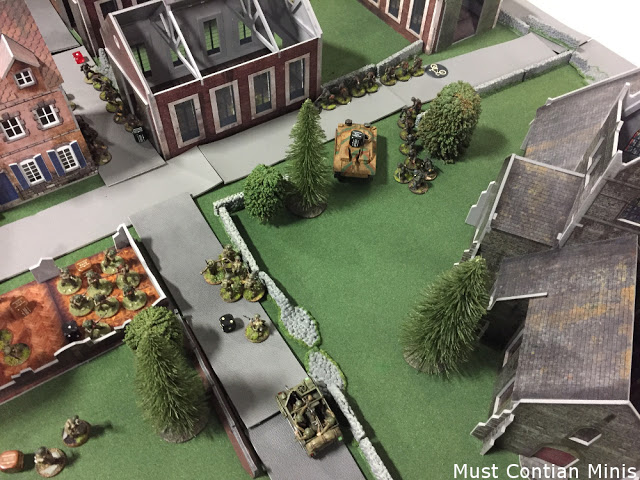
| Here we are on the last turn of the game. Both sides have been taking casualties and with the “Command & Control Breakdown” rule still in effect, there is not much that each side can do at this point in the game. Most of the units are stuck as either “down” or in “ambush.” |
 |
| With my last die, I rushed my guys in the building out across the street and assaulted the Flame Thrower team. |
The assault pictured above was the last action of the game, and it changed the outcome of the game. Instead of being a German Victory, it was now a Draw. The Germans killed more units, but the British occupied three quadrants of the table while the Germans only had two. Once the points were tallied, it was an 8-8 draw.
Despite ending in a draw, we had a great time playing this game of Bolt Action: Sea Lion!!!
I would like to send out a huge thank you to Forbes Hobbies in Cambridge, Ontario, Canada for providing us with gaming space and allowing us to take pictures in their store. The table that you see below is set mostly with their scenery and it makes a huge difference when you play on such beautiful tables. What a good experience!!!
If you live in South Western Ontario and are interested in Bolt Action, I encourage you to visit this store sometime. The store carries stock of Warlord Games‘ Bolt Action and Test of Honour, along with games by other manufacturers. Forbes Hobbies itself is within a 1.5 hour drive of Niagara Falls, Toronto and London. If you want to get a game in, be sure to call them before coming out.
 |
| The scene at the end of a very enjoyable game. Special thanks goes out to Forbes Hobbies for allowing us to use their tables and terrain. |
Until next time, Happy Gaming Everyone!!!
Must Contain Minis is a participant in the Amazon Services LLC Associates Program, an affiliate advertising program designed to provide a means for sites to earn advertising fees by advertising and linking to Amazon.
Pingback: Thou Shalt Not Pass!!! Bolt Action Sea Lion Battle Report | Must Contain Minis